How to Prep Nails for Press-Ons: Your Ultimate Manicure Guide

Your nails are like a blank diary page, and press-ons are the signature at the bottom, sealing the story. But what happens if the pages aren’t smoothed out? The signature doesn’t stick, and the story falls apart.
Here’s a surprising fact: Prepping your nails properly can double the lifespan of your press-ons.
Ready to master how to prep nails for press ons? Let’s create a masterpiece.
Understanding Press-On Nails
Press-on nails are more than just a quick fix; they’re a revolution in beauty. These artificial nail enhancements bring salon-level perfection to your home in minutes.
Whether you’re rushing to a wedding or simply jazzing up your look for the weekend, press-ons offer a temporary yet transformative solution.
Think of them as fashion’s answer to on-demand beauty—always ready, always stunning.
Also Read: Top 5 Simple Black and White Nails: A Canvas of Elegance

Benefits of Using Press-On Nails
Why press-ons? Because they check all the boxes:
- Convenience: A salon-worthy manicure without the commute.
- Affordability: Perfect nails for less than the cost of a coffee date.
- Design Diversity: From minimalist nudes to neon art, press-ons cover every vibe.
- Gentle on Nails: Unlike gels or acrylics, they can be removed without damage when done right.
It’s beauty, reinvented for the modern multitasker.
Also Read: How to Remove Glamnetic Nails: Quick and Easy Removal Guide
Essential Tools and Materials for Nail Preparation
Prepping your nails is like gearing up for a high-stakes project—you need the right tools to succeed. Gather these essentials:
- Nail file and buffer: For precise shaping and prepping.
- Cuticle pusher: Your gentle helper for a clean nail bed.
- Isopropyl alcohol or nail cleanser: Banishes oils and residue.
- Lint-free wipes: To keep the surface immaculate.
- Adhesive tabs or nail glue: The foundation of long-lasting results.

Step-by-Step Guide to Prepping Nails
Every masterpiece starts with preparation. Follow these steps to ensure your press-ons not only look stunning but stay securely in place.
Importance of Nail Hygiene Before Application
Think of your nails as the foundation for a skyscraper. Without cleaning away dirt, oil, and bacteria, the structure can crumble. Start by scrubbing your hands and nails with warm water and soap.
Also Read: Dark Winter Nail Designs: Bold, Cozy, and Perfect for the Season
How to Properly Clean and Dry Your Nails?
- Use a nail brush to scrub away dirt and residue.
- Swipe nails with isopropyl alcohol to remove natural oils.
- Pat dry with a lint-free towel—no fuzz allowed!

Clean nails are like a clean slate, ready for perfection.
Trimming and Shaping Your Natural Nails
The fit of your press-ons depends on the shape of your natural nails. Use clippers to trim excess length, then a nail file to shape them. Match the edges to your press-ons for a seamless look.
Buffing the Nail Surface for Better Adhesion
Imagine trying to stick a poster on a glass wall—it won’t hold. Buffing creates a slightly rough texture on your nails, improving adhesive grip. Gently buff the surface, focusing on removing shine, but avoid over-thinning your nails.

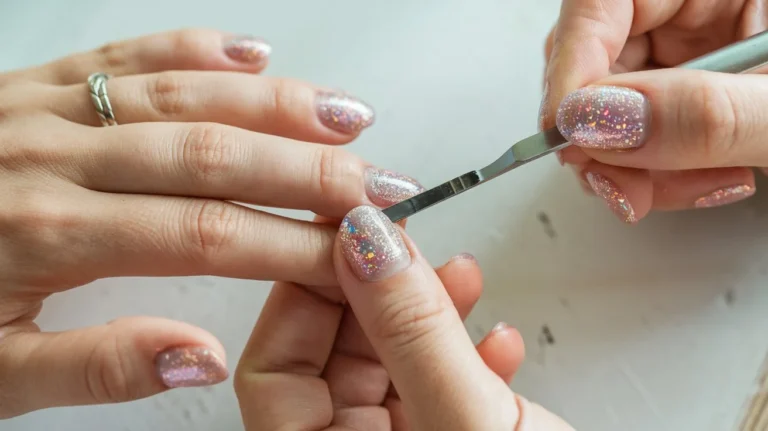
Managing Cuticles for a Smooth Application
Your cuticles frame the art of your nails. Push them back gently using a cuticle pusher. If necessary, trim excess skin to create a clean canvas. This step prevents lifting and ensures a snug fit for your press-ons.
Dehydrating Nails to Remove Oils
Oil is the hidden saboteur of adhesion. Swipe your nails with isopropyl alcohol or a nail dehydrator to remove every trace. Think of it as priming a wall before painting—it’s essential.
Also Read: 15 3D Nail Design Ideas: Elevate Your Nail Game with Art That’s Out of This World!
Choosing the Right Size and Shape of Press-Ons
Press-ons are like tailored suits—fit is everything. Lay them out and match each to your nails. If you’re between sizes, opt for the smaller one and file the edges for a custom fit. A snug fit prevents lifting and keeps the press-ons looking natural.

Applying Adhesive: Glue vs. Adhesive Tabs
Your adhesive choice is your commitment level:
- Glue: A strong bond for lasting elegance.
- Adhesive Tabs: A temporary solution for a quick glam fix.
Apply glue sparingly—a drop on your nail and a small dab on the press-on. Press firmly for 10 seconds. For tabs, press and peel, then secure the press-on.
Also Read: Mastering Nail Designs with One Glitter Nail: A Sparkly Affair!
Aligning and Pressing On the Nails Correctly
Align the press-on slightly under the cuticle, tilting it to avoid bubbles. Press down firmly, holding for 10–15 seconds to create a secure bond. Voilà—your nails are red-carpet ready.

Tips for Maintaining Your Press-On Manicure
- Avoid water exposure: Let the adhesive cure for an hour before washing hands.
- Daily care: Use gloves for dishwashing or cleaning to extend wear.
- Fix lifts immediately: A tiny dab of glue can save a nail on the brink.
Also Read: The Ultimate Guide: What is the Best Shape Nails for Fat Fingers?
Removing Press-On Nails Safely
When it’s time to say goodbye, do it gently. Soak nails in warm, soapy water for 10 minutes. Use a cuticle pusher to lift the edges without force. Post-removal, hydrate your nails with cuticle oil to restore moisture.

Final Thoughts
Learning how to prep nails for press-ons isn’t just about following steps—it’s about elevating your beauty routine. Every buff, trim, and clean swipe contributes to a manicure that feels professional and lasts longer than ever. Now you’re equipped to enjoy flawless, head-turning nails with confidence and style.
Your hands are the storytellers of your style. Let them speak beautifully. Feel free to leave a comment below with your thoughts. And don’t forget to check out our Pinterest for more beauty tips and inspiration!