Glitter Easter Nails: Sparkling Designs for a Festive Spring Celebration

Easter brings with it a celebration of renewal, vibrant colors, and the perfect opportunity to refresh your manicure with seasonal nail art, including various easter nail ideas. This article will cover the best Easter nail colors along with glitter designs. Glitter Easter nails combine the festive spirit of the holiday with eye-catching sparkle that elevates traditional Easter nail designs to something truly special. Incorporating bright colors can enhance the festive appeal of glitter Easter nails. Whether you’re attending an Easter brunch, participating in family celebrations, or simply want to embrace the season with style, incorporating glitter into your Easter manicure adds that perfect touch of glamour and fun.
Introduction to Easter Nail Art
Easter is a time for celebration and renewal, and what better way to get into the festive spirit than with some adorable Easter nail art? Easter nails are a great way to add some personality to your outfit and show off your creativity. From pastel shades to bunny nail art, there are countless Easter nail designs to choose from. In this article, we’ll explore the best Easter nail art ideas, including simple Easter nail designs, cute Easter nails, and bold Easter nail colors. Whether you’re looking for inspiration for your Easter ensemble or just want to try out a new nail design, we’ve got you covered. With the help of nail polish, dotting tools, and a little bit of creativity, you can create your own unique Easter nail art design. So why not get started and make this Easter one to remember with some beautiful and festive Easter nail art?

Why Glitter Easter Nails Are Trending This Spring
Glitter has become increasingly popular in Easter nail designs, making them some of the best easter nail designs, for several compelling reasons:
- It adds dimension and visual interest to pastel colors
- Glitter combined with bold colors creates a festive feel appropriate for holiday celebrations
- The sparkle catches light beautifully in spring sunshine
- It allows for creativity while maintaining a seasonal aesthetic
- Glitter can be incorporated subtly or boldly depending on personal preference
Bright shades are also popular for adding a vibrant touch to Easter nail designs.
This versatility makes glitter Easter nails suitable for nail enthusiasts of all ages and style preferences, from those who prefer a hint of shimmer to those who embrace full sparkle.

Also Read: Easter Nails Art: A Blooming Canvas for Your Fingertips
Essential Color Combinations for Glitter Easter Nails
Pastel Bases with Glitter Accents
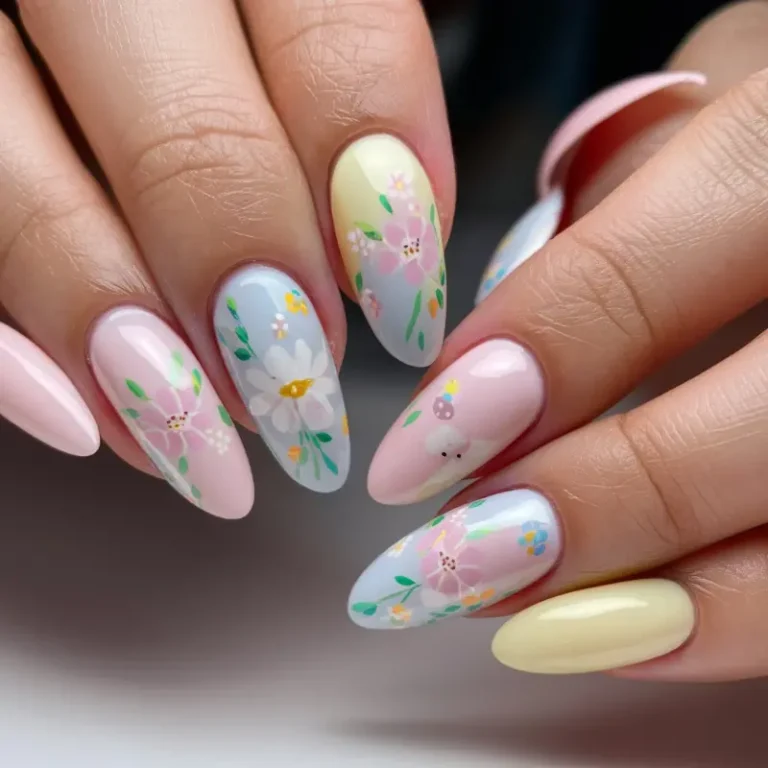
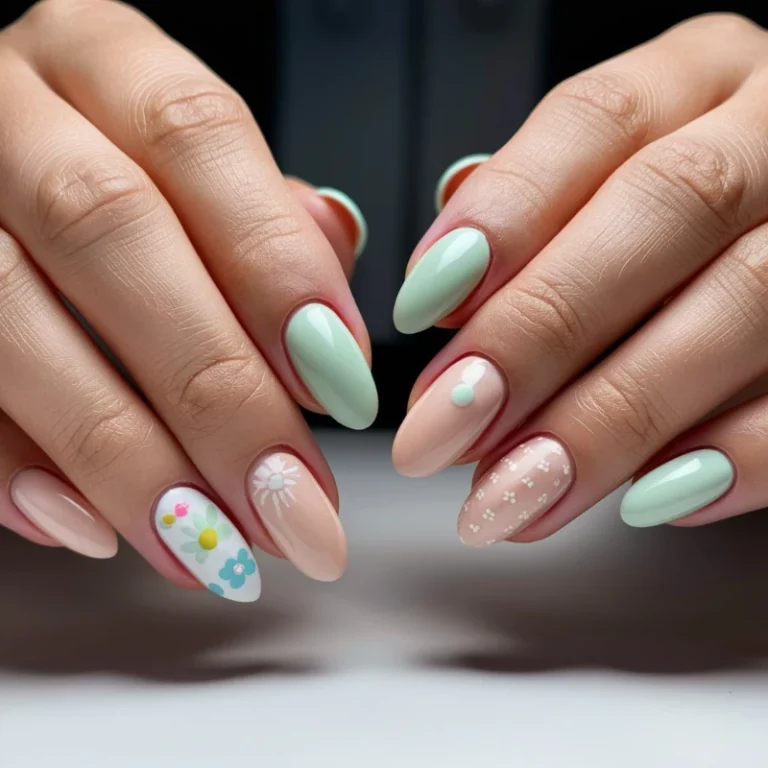
The foundation of most Easter nail designs begins with pastel colors, which pair beautifully with various glitter options. Pastel hues are a staple for Easter nail designs, providing a soft and elegant base for glitter accents:
- Lavender base with silver glitter: Creates a sophisticated, cool-toned look
- Butter yellow with gold glitter: Offers warmth and sunshine vibes
- Mint green with iridescent glitter: Provides a fresh, springtime feel
- Baby pink with rose gold glitter: Creates a feminine, romantic aesthetic
- Light blue with holographic glitter: Delivers a modern, eye-catching effect
These combinations of different Easter nail colors honor traditional Easter color palettes while adding contemporary sparkle.

Glitter as the Star
For those who prefer more dramatic Easter nails:
- Pastel glitter ombré: Gradient effects from solid color to full glitter
- Full-coverage glitter in Easter shades: Holographic pastel glitters as standalone colors
- Glitter French tips: Traditional French manicure updated with sparkly tips
- Chunky glitter accents: Statement pieces on one or two nails per hand
- Mixed glitter finishes: Combining fine and chunky glitters for textural interest

Also Read: Easter French Nails: Crafting a Timeless Spring Celebration on Your Fingertips
15 Stunning Glitter Easter Nail Designs
1. Pastel Glitter French Tips
A modern twist on the classic French manicure:
Materials needed:
- Base coat
- Sheer pink or nude polish
- Pastel glitter polishes in Easter colors
- Thin nail art brush
- Top coat
Steps:
- Apply base coat followed by two coats of sheer pink or nude polish
- Once dry, use a thin brush to create French tips with pastel glitter polishes
- For a more modern look, try slightly curved or angled tips
- Seal with top coat for shine and protection
This design works beautifully on both short and long nails, offering a subtle yet festive nod to Easter.

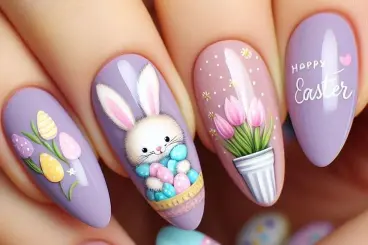
2. Easter Bunny Accent with Glitter Background
Combine cute Easter bunny nail art with glitter for a playful design:
Materials needed:
- Base coat
- Pastel glitter polish for background
- White polish for bunny
- Pink polish for ears and nose
- Black polish for details
- Thin nail art brush and dotting tool
- Top coat
Steps:
- Apply base coat followed by two coats of pastel glitter polish
- Once dry, use white polish to create a bunny face on one accent nail. This design results in cute nails that are perfect for the festive season.
- Add pink inner ears and nose
- Use a dotting tool to add black eyes and whiskers
- Seal with top coat
This design creates a perfect balance between festive character art and glamorous glitter, combining cute design elements like Easter bunnies with glitter for a playful look.

Also Read: Springtime Nails for Easter: A Burst of Color and Creativity
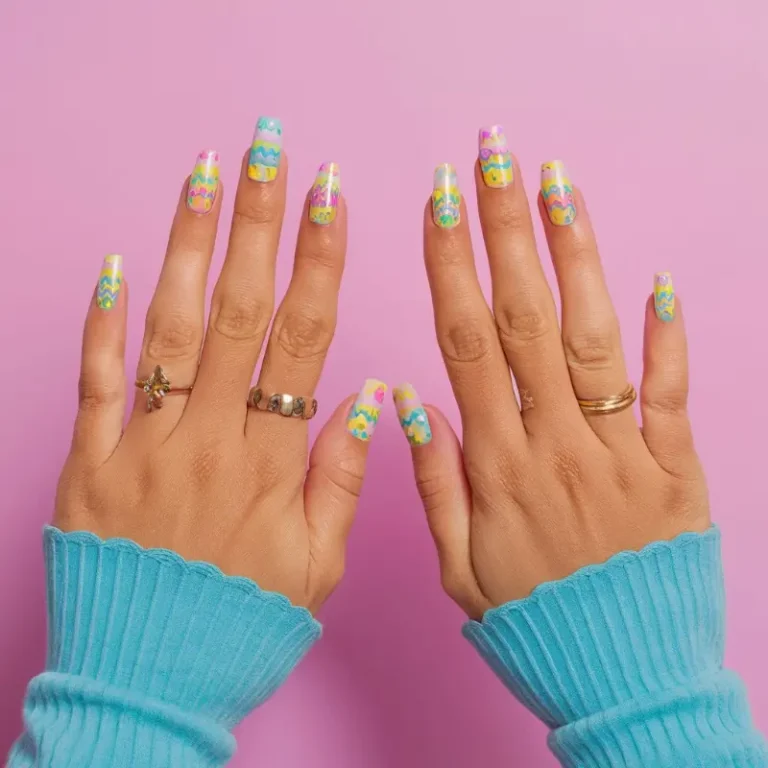
3. Glitter Easter Egg Nails
Celebrate the classic Easter egg with sparkly interpretations, a popular easter nails design:
Materials needed:
- Base coat
- Pastel polishes
- Complementary glitters
- Thin nail art brush
- Dotting tools
- Top coat
Steps:
- Apply base coat followed by two coats of pastel polish
- Use a thin brush to outline egg shapes on each nail
- Fill some eggs with solid color and others with matching glitter
- Add small flowers to some eggs to enhance the festive look
- Add polka dots, stripes, or other decorative elements to some eggs
- Seal with top coat
This simple easter nail design allows for creativity while maintaining the Easter theme.

4. Glitter Ombré Easter Nails
Create a gradient effect from solid pastel to full glitter is a great idea for Easter nails:
Materials needed:
- Base coat
- Pastel polish in your chosen Easter color
- Matching or complementary glitter polish
- Makeup sponge
- Top coat
Steps:
- Apply base coat followed by two coats of pastel polish
- Once dry, apply glitter polish to a makeup sponge
- Dab the sponge onto the tips of your nails, gradually building intensity
- For a reverse effect, concentrate glitter near the cuticle instead
- Seal with top coat
This technique creates a sophisticated Easter manicure that transitions beautifully from subtle to statement. It adds a unique touch to your Easter manicure.

Also Read: Easter Bunny Nails: The Ultimate Guide to a Hoppy, Trendy Manicure
5. Glitter Polka Dot Easter Nails
Combine two classic elements—polka dots and glitter—for a festive look:
Materials needed:
- Base coat
- Pastel polish for base
- Various glitter polishes
- Dotting tools in different sizes
- Top coat
Steps:
- Apply base coat followed by two coats of pastel polish. Using pretty pastel hues as the base enhances the overall festive appeal.
- Once dry, use dotting tools to create polka dots of various sizes using glitter polishes
- Vary the placement and size of dots for a playful effect
- Seal with top coat
This design is easily DIY-friendly and creates one of the cutest Easter looks that’s both cute and sophisticated.

6. Glitter-Dipped Easter Bunny Ears
Create adorable bunny ears with glitter accents:
Materials needed:
- Base coat
- Pastel polish for base
- White polish for bunny ears
- Pink polish for inner ears
- Matching glitter polish
- Thin nail art brush
- Top coat
Steps:
- Apply base coat followed by two coats of pastel polish
- Paint white bunny ears extending from the cuticle upward
- Add pink Easter inner ears
- Apply glitter polish to the tips of the ears for a “dipped” effect
- Seal with top coat
Using white tips for the bunny ears can create a classic look with a festive twist.
This design creates a playful Easter bunny motif with an extra touch of sparkle.

Also Read: Easter Egg Nails: A Festive Guide to Playful, Trendy Nail Art
7. Pastel and Glitter Marble Easter Nails
Create a sophisticated marble design with Easter colors and glitter:
Materials needed:
- Base coat
- White or light pastel polish
- 2-3 pastel polishes
- Matching or clear glitter polish
- Small container of water
- Toothpick or nail art tool
- Tape for protecting cuticles
- Top coat
Steps:
- Apply base coat followed by white or light pastel polish. Using a light pastel polish as the perfect base enhances the marble effect.
- Tape around nails to protect skin
- Drop small amounts of different pastel polishes, including purple, and glitter polish into water
- Use a toothpick to create a marble pattern
- Dip nail into the design
- Remove tape and clean up edges
- Seal with top coat
This creates an elegant Easter nail design with depth and visual interest.

8. Glitter Easter Egg Hunt Nails
Tell a story with your Easter nails:
Materials needed:
- Base coat
- Light green or pastel blue polish for background
- Various pastel and glitter polishes
- Thin nail art brush
- Dotting tools
- Top coat
Steps:
- Apply base coat followed by light green or pastel blue polish to represent grass or sky, which complements pink Easter nails.
- Use thin brush to paint small Easter eggs in various colors across nails
- Add glitter to some eggs for a special “prize egg” effect. You can stick to a cohesive color palette for a more polished look.
- Use dotting tools to add details to eggs
- Seal with top coat
This narrative design captures the fun of an Easter egg hunt right on your fingertips.

Also Read:Peeps Nail Art for Easter: Cute, Fun & Colorful Designs
9. Glitter Gradient French Tips in Easter Colors
Create a modern French manicure with multiple Easter colors, perfect for simple easter nails:
Materials needed:
- Base coat
- Sheer pink or nude polish
- 4-5 pastel glitter polishes
- Thin nail art brush
- Top coat
Steps:
- Apply base coat followed by sheer pink polish
- Create French tips using different pastel glitter polishes on each nail
- For added interest, try a gradient effect within each tip
- Seal with top coat
This design is pretty simple to achieve yet looks sophisticated. It creates a cohesive yet varied Easter nail look that incorporates multiple spring colors. Plus, this design can be worn season long, making it versatile beyond Easter.

10. Negative Space Glitter Easter Nails
Incorporate trendy negative space with Easter glitter:
Materials needed:
- Base coat
- Clear polish
- Pastel glitter polishes
- Nail vinyl or tape for creating shapes
- Top coat
Steps:
- Apply base coat
- Place nail vinyl or tape to create geometric shapes or Easter motifs
- Apply pastel glitter polish within the exposed areas
- Carefully remove vinyl/tape before polish dries completely
- Seal with top coat
This contemporary approach creates modern Easter nails with clean lines and sparkling accents.

11. Butter Yellow Glitter Accent Easter Nails
Embrace pretty pastels, one of spring’s favorite colors, with glitter accents:
Materials needed:
- Base coat
- Butter yellow polish
- Gold or iridescent glitter polish
- Top coat
Steps:
- Apply base coat followed by two coats of butter yellow polish on most nails
- On accent nails, apply butter yellow and top with glitter polish
- For added interest, create a glitter gradient on accent nails
- Seal all nails with top coat
This simple yet effective design celebrates spring’s sunny disposition with festive sparkle.

Also Read:Simple Easter Nails: Easy and Elegant Designs for Spring
12. Glitter Easter Basket Weave Nails
Create the look of an Easter basket with glitter accents:
Materials needed:
- Base coat
- Pastel polish for base
- Brown or tan polish for basket weave
- Pastel glitter polishes
- Thin nail art brush
- Top coat
Steps:
- Apply base coat followed by pastel polish
- Use thin brush to create basket weave pattern with brown polish
- Add small glitter “eggs” in the basket using dotting tool and glitter polishes
- Seal with top coat
This detailed design creates a festive Easter scene with textural interest.

13. Glitter-Lined Easter Bunny Silhouette
Create elegant bunny outlines with glitter definition:
Materials needed:
- Base coat
- Pastel polish for base
- Fine glitter polish in contrasting color
- Thin nail art brush
- Top coat
Steps:
- Apply base coat followed by pastel polish
- Use thin brush to outline bunny silhouettes with glitter polish
- Add small details like tails or ears with additional glitter
- Seal with top coat
This sophisticated design offers a grown-up take on Easter bunny nail art.

Also Read: Easter Gothic Nails: Where Dark Elegance Meets Springtime Rebellion
14. Pastel Rainbow with Glitter Clouds
Create a spring sky perfect for Easter:
Materials needed:
- Base coat
- Light blue polish for background
- Various pastel polishes
- White and silver glitter polishes
- Makeup sponge
- Thin nail art brush
- Top coat
Steps:
- Apply base coat followed by light blue polish
- Use a makeup sponge to create a pastel rainbow across multiple nails
- Add “clouds” using white polish mixed with silver glitter
- Seal with top coat
This whimsical design captures spring’s changeable weather with a festive Easter color palette.

15. Glitter-Filled Easter Egg Outlines
Create elegant egg designs with glitter filling:
Materials needed:
- Base coat
- Nude or pastel polish for base
- White or black polish for outlines
- Various glitter polishes
- Thin nail art brush
- Top coat
Steps:
- Apply base coat followed by nude or pastel polish
- Use thin brush to create egg outlines
- Fill some eggs with different glitter polishes
- Leave some eggs outlined but unfilled for contrast
- Seal with top coat
This easter nail art design creates a sophisticated Easter egg display with sparkling dimension.

Tips for Perfect Glitter Easter Nails
Working with Glitter Polish
Glitter can be tricky to apply evenly. Try these techniques:
- Dabbing vs. Stroking: For chunky glitter, dab rather than stroke the polish on to achieve nails perfect for Easter
- Glitter Placement: For precise control, apply clear polish and place glitter with a toothpick
- Sponging Method: For dense glitter coverage, apply with a makeup sponge
- Glitter Gradient: Apply more heavily at tips or cuticle and fade for a gradient effect
- Sandwich Technique: Layer glitter between clear coats for depth and longevity
These techniques ensure your glitter Easter nails can be worn throughout the season.

Also Read: Summer Butterfly Nails: Transform Your Manicure into a Work of Art
Making Glitter Easter Nails Last
Glitter manicures can actually last longer than regular polish when properly applied:
- Apply a peel-off base coat underneath for easier removal
- Use a few drops of cuticle oil around nails before removal to prevent damage
- Seal edges with top coat to prevent lifting
- Apply a fresh layer of top coat every 2-3 days to maintain shine
- Wear gloves when cleaning to protect your festive Easter design
DIY Tools for Glitter Easter Nail Art
Don’t have specialized nail art tools? Try these alternatives:
- Bobby pin: Works as a dotting tool for creating small details
- Toothpick: Perfect for placing individual glitter pieces
- Cut-up makeup sponge: Ideal for creating ombré glitter effects
- Straws: Cut the end at an angle for a makeshift nail art tool
- Tape: Create clean lines for geometric glitter placement

Glitter Easter Nails for Different Nail Lengths and Shapes
Short Nails
Glitter Easter designs for shorter nails:
- Glitter French tips create the illusion of length
- Single accent nails with Easter bunny designs
- Subtle glitter ombré effects
- Minimal Easter egg outlines with glitter filling
- Polka dot patterns with alternating pastel and glitter dots

Medium-Length Nails
The most versatile canvas for Easter designs:
- Full glitter accent nails paired with pastel solids
- Easter egg designs with detailed glitter sections
- Bunny silhouettes with glitter backgrounds
- Pastel French tips with glitter overlays
- Multiple design elements across different nails
Long Nails
Taking advantage of extended space:
- Detailed Easter scenes with glitter elements
- Gradient designs flowing from cuticle to tip
- Multiple Easter motifs on a single nail
- Elaborate basket weave patterns with glitter eggs
- Negative space designs with strategic glitter placement

Also Read: Summer Ballerina Nails: The Elegance Your Fingertips Deserve
Seasonal Adaptations: Wearing Glitter Easter Nails Beyond the Holiday
The beauty of many glitter Easter nail designs is their versatility throughout spring:
Early Spring (March-April)
- Full Easter themes with bunnies, eggs, and baskets are especially Easter
- Pastel colors with festive glitter accents. Incorporating bright shades can enhance the festive look.
- Holiday-specific designs for Easter celebrations
Mid-Spring (April-May)
- Transition to more general spring themes
- Maintain pastel colors but reduce Easter-specific motifs
- Focus on floral elements with glitter accents
Late Spring (May-June)
- Brighten pastels toward summer shades
- Incorporate more negative space for a lighter feel
- Reduce glitter to accent nails only for a more subtle look

Pairing Your Glitter Easter Nails with Your Easter Ensemble
Coordinate your manicure with your holiday attire:
Formal Easter Celebrations
For church services or formal gatherings:
- Subtle glitter French tips in pastel colors
- Elegant egg designs with minimal glitter
- Sophisticated color combinations like butter yellow and gold
- Clean, precise designs that complement dressy attire
Casual Easter Get-Togethers
For family brunches or informal celebrations:
- Playful bunny designs with glitter accents
- Brighter color combinations with mint tips can add a fresh look
- Fun polka dot patterns in Easter colors
- Mix-and-match designs across different nails can add a unique touch to your Easter manicure

Easter-Themed Events
For those hosting or attending Easter egg hunts or children’s parties:
- Whimsical designs with Easter basket motifs
- Bright, cheerful colors with maximum glitter
- Interactive designs that children will find engaging
- Durable finishes that can withstand outdoor activities
Glitter Easter Nails for Different Age Groups
Teens and Young Adults
- Bold glitter placement
- Trendy negative space designs
- Mix of pastel and neon with glitter accents
- Contemporary takes on Easter motifs
- Experimental textures and finishes

Also Read: Summer Nails Designs 2025: A Canvas of Creativity and Color!
Adults
- Sophisticated glitter French tips
- Elegant Easter egg designs
- Subtle sparkle with pastel bases
- Professional-friendly options with minimal glitter
- Classic designs with modern twists

Mature Nail Enthusiasts
- Refined glitter accents on one or two nails
- Traditional French manicures with subtle glitter tips
- Elegant pastel bases with fine shimmer
- Sophisticated egg designs with minimal sparkle
- Classic color combinations with modern application techniques
Trending Glitter Finishes for Easter 2023
Stay current with these popular glitter options:
Holographic Glitter
- Shifts colors as it catches light
- Creates dimension and visual interest
- Pairs beautifully with pastel Easter bases
- Offers a modern take on traditional sparkle

Bio-Degradable Glitter
- Eco-friendly alternative to traditional glitter
- Available in all Easter-appropriate colors
- Performs similarly to conventional glitter
- Appeals to environmentally conscious nail enthusiasts
Chrome Powder with Glitter
- Creates mirror-like finish with sparkle
- Can be applied over pastel bases for Easter-appropriate shine
- Offers sophisticated alternative to traditional glitter
- Works well for accent nails in Easter designs

Jelly Glitter
- Suspended in translucent colored base
- Creates depth and dimension
- Perfect for creating “Easter egg” effects
- Allows for layering and building intensity
Professional vs. DIY Glitter Easter Nails
When to Visit a Professional
Consider booking a salon appointment for:
- Intricate Easter designs requiring specialized skills
- Perfect glitter application without texture issues
- Nail extensions or enhancements for your Easter design
- Long-lasting gel or acrylic options for extended wear
- Access to professional-grade glitters and tools
When to DIY
Creating your own glitter Easter nails works well when:
- You want to experiment with different designs
- You’re working with a limited budget
- You enjoy the creative process
- You need flexibility to change your design
- You have basic nail art skills and tools

Conclusion: Embracing the Joy of Glitter Easter Nails
Glitter Easter nails offer the perfect combination of seasonal celebration and sparkling style, inspiring various nail art ideas . Whether you prefer subtle shimmer or bold sparkle, there’s a glitter Easter nail design that can express your personal aesthetic while honoring the festive spirit of the holiday.
The versatility of glitter in Easter nail art allows for endless creativity—from sophisticated French tips with a hint of sparkle to playful bunny designs with glitter accents. These designs can be adapted for any age group, nail length, or occasion, making them accessible to all nail enthusiasts who want to celebrate spring with a touch of glamour.
As you prepare for Easter celebrations, consider how glitter and nail polish can elevate your seasonal manicure from simple to spectacular. Whether you visit a professional nail artist or create your design at home, glitter Easter nails provide a festive finishing touch to your spring style that can bring joy long after the Easter bunny has hopped away. Don’t forget to check out our Pinterest for more beauty tips and inspiration!
With the right techniques, tools, and inspiration, your glitter Easter nails can become a highlight of your seasonal self-expression—a small but significant way to celebrate renewal, color, and the sparkling possibilities of spring. From subtle shimmer to bold sparkle, let your Easter manicure reflect the joy and brightness of the season with the perfect touch of glitter.