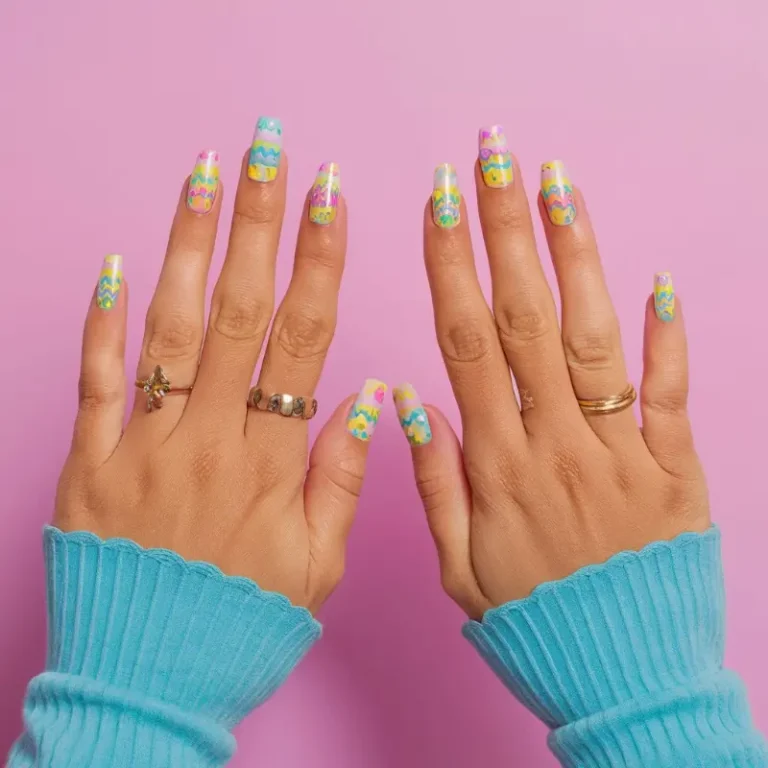
Easter Egg Nails: A Festive Guide to Playful, Trendy Nail Art 🎨
Imagine your nails as tiny Easter eggs waiting to be decorated, each one a miniature canvas of creativity and color. Easter Egg Nails are more than just a seasonal trend—they’re a celebration of spring, renewal, and artistic expression.
Whether you’re a nail art pro or a beginner looking for fun, festive designs, this guide will help you craft the perfect Easter-inspired manicure that’s as eye-catching as a beautifully decorated egg in an Easter basket.
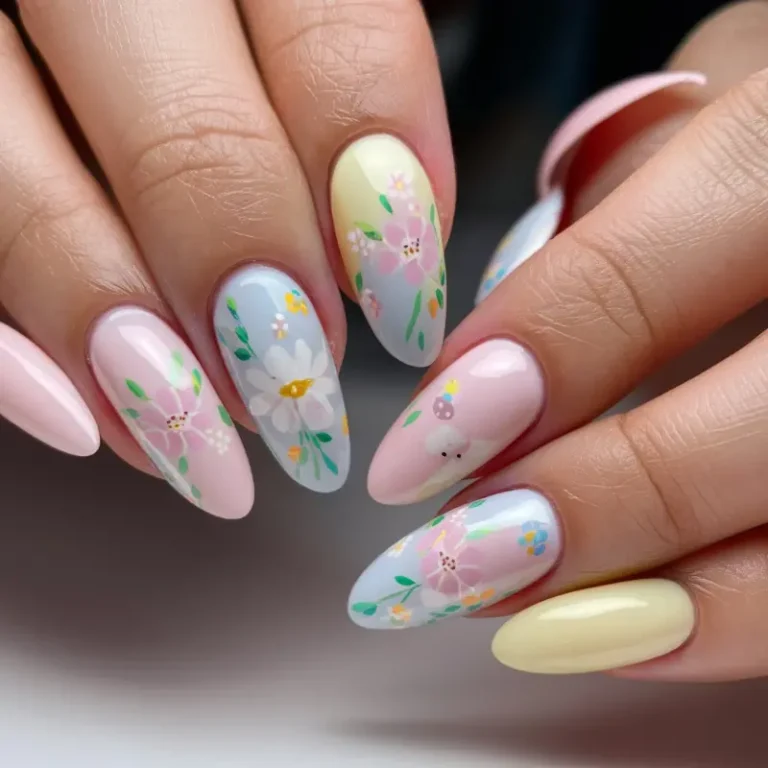
Best Colors for Easter Egg Nail Art
Choosing the right colors for your Easter Egg Nails is like picking the perfect shades for painting real Easter eggs—you want harmony, vibrancy, and a touch of whimsy.
Top Color Choices:
✅ Pastels: Soft pink, lavender, mint green, baby blue, peach, butter yellow
✅ Neutrals: Off-white, nude, soft gray (for contrast)
✅ Brights: Coral, fuchsia, sky blue (for a playful pop)
✅ Metallics: Gold, silver, rose gold (to add elegance)
A mix of pastels with metallic accents creates a chic yet fun Easter-inspired manicure.
Also Read: Easter Nails Art: A Blooming Canvas for Your Fingertips

How to Create DIY Easter Egg Nails
Painting Easter Egg Nails is like decorating a batch of sugar cookies—it’s all about layers, patterns, and patience.
Step-by-Step Guide:
- Start with a pastel base (light pink, lavender, or mint).
- Use a dotting tool to create polka dots for a speckled egg effect.
- Add stripes, zigzags, or floral details using a fine nail brush.
- Apply a top coat to seal the design and add shine.
For an effortless look, try Easter-themed nail stickers or decals!
Also Read: Easter French Nails: Crafting a Timeless Spring Celebration on Your Fingertips

Essential Tools for Perfect Easter Nails
Creating flawless Easter Egg Nails without the right tools is like trying to paint a masterpiece without brushes. Here’s what you need:
🎨 Dotting tools – For creating polka dots and small details
🎨 Striping tape – To get sharp lines and geometric designs
🎨 Fine nail brushes – Essential for intricate details
🎨 Matte & glossy top coats – To enhance durability
🎨 Nail stickers & decals – For an easy, no-fuss design
Also Read: Springtime Nails for Easter: A Burst of Color and Creativity
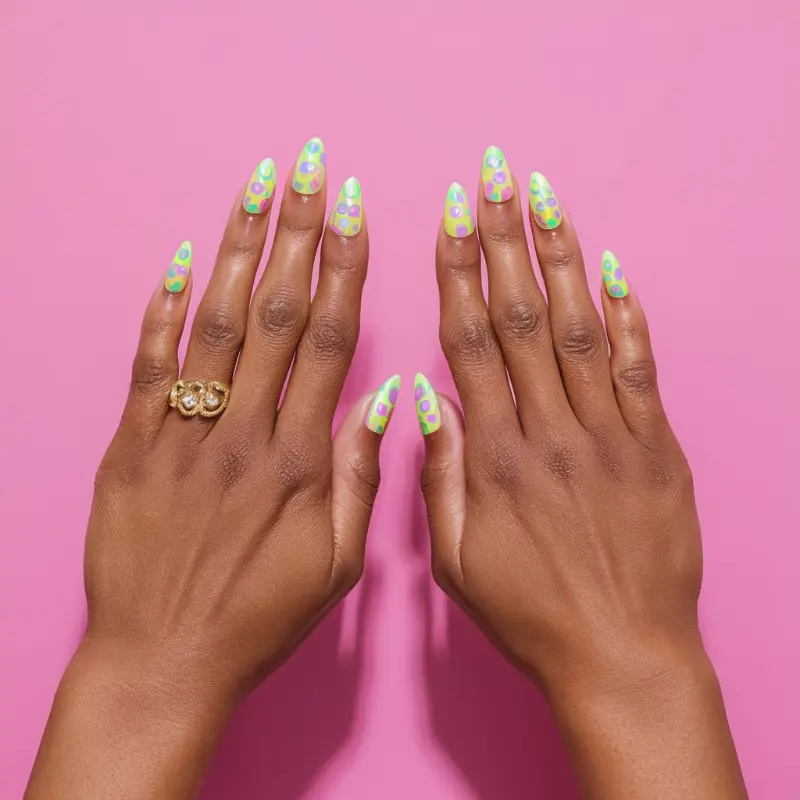
Trendy Easter Egg Nail Designs for 2025
Every year, Easter nail art trends evolve, just like fashion. Here are the top trending Easter Egg Nails for 2025:
✨ Minimalist Egg Art – Soft pastel bases with simple geometric egg outlines
✨ Speckled Egg Nails – Mimicking the look of quail eggs with speckled polish
✨ Abstract Easter Eggs – Modern, artsy interpretations with fluid shapes
✨ Holographic Easter Nails – Shimmering, iridescent nails with pastel undertones

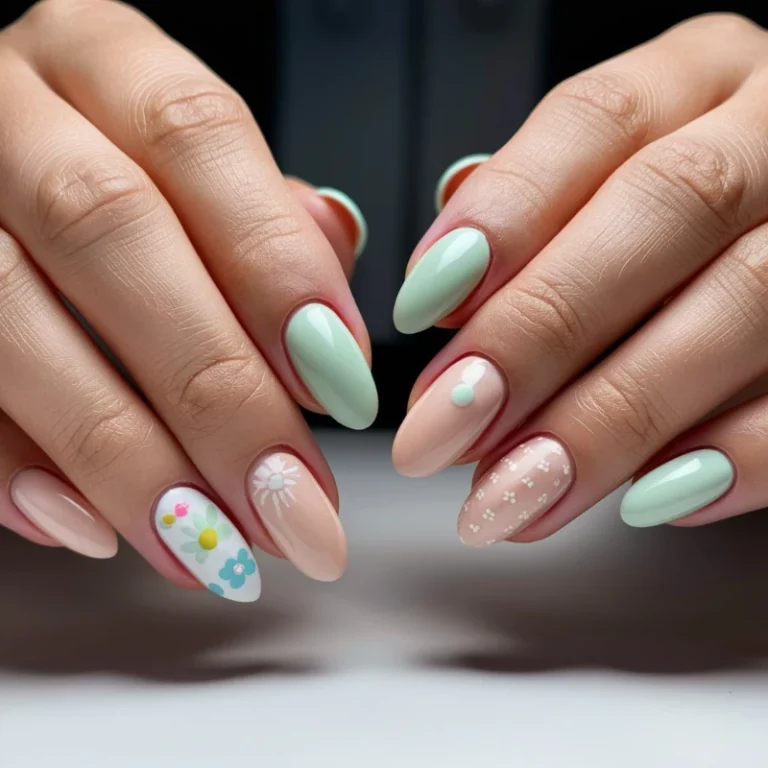
Simple Easter Egg Nail Ideas for Beginners
If you’re new to nail art, think of it like coloring inside the lines with crayons—start with easy, forgiving designs:
🌸 Polka dots – The simplest way to get an Easter egg effect
🌸 Stripes – Use striping tape for effortless straight lines
🌸 Speckled designs – Lightly dab a darker shade over a pastel base
🌸 Sticker accents – Perfect for a quick, stylish manicure
Also Read:Easter Bunny Nails: The Ultimate Guide to a Hoppy, Trendy Manicure

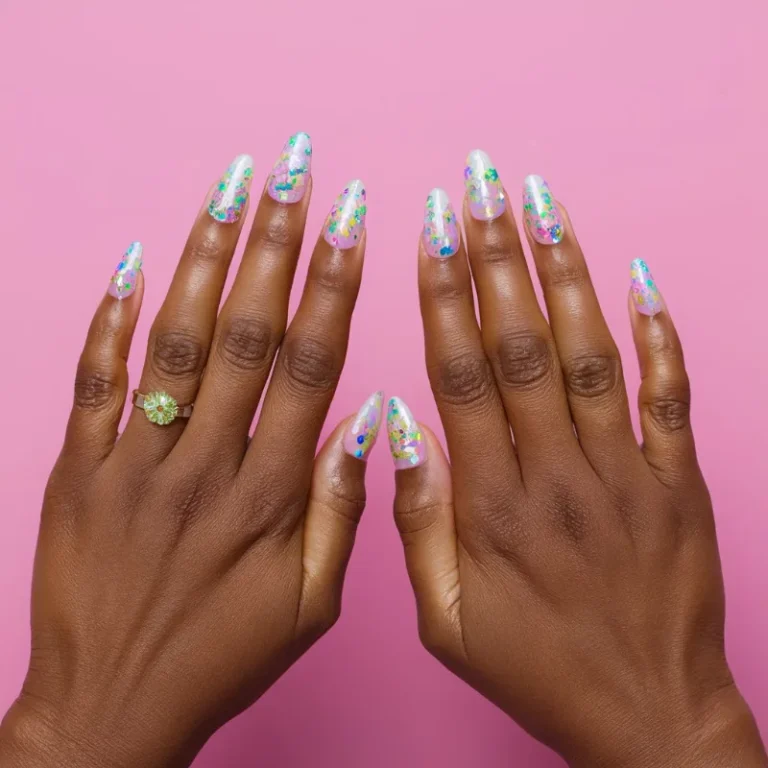
Glittery Easter Egg Nails for a Sparkly Look
Glitter is like sprinkling fairy dust over your nails—it transforms a simple design into something magical. Try:
💖 Glitter gradients – Fading glitter tips over pastel bases
💖 Glittery top coat – Adds a subtle sparkle to any design
💖 Chunky glitter accents – Use on an accent nail for an extra pop
Ombre Easter Egg Nails: A Soft Gradient Look
Ombre nails are like a sunset melting into the horizon—seamless, dreamy, and effortlessly chic. For an Easter twist:
🎨 Blend pastel shades from light to dark
🎨 Use a sponge to achieve a soft gradient
🎨 Add speckles or floral accents for extra detail

French Tip Easter Egg Nails: A Chic Twist
The classic French manicure gets an Easter makeover by replacing white tips with pastel or patterned tips. For a stylish effect:
🎀 Pastel French tips – Swap white for soft pink, baby blue, or lavender
🎀 Patterned tips – Add polka dots, stripes, or florals
🎀 Glitter French tips – A subtle sparkle elevates the look
Also Read: Spring French Nails: Fresh Takes on a Timeless Style

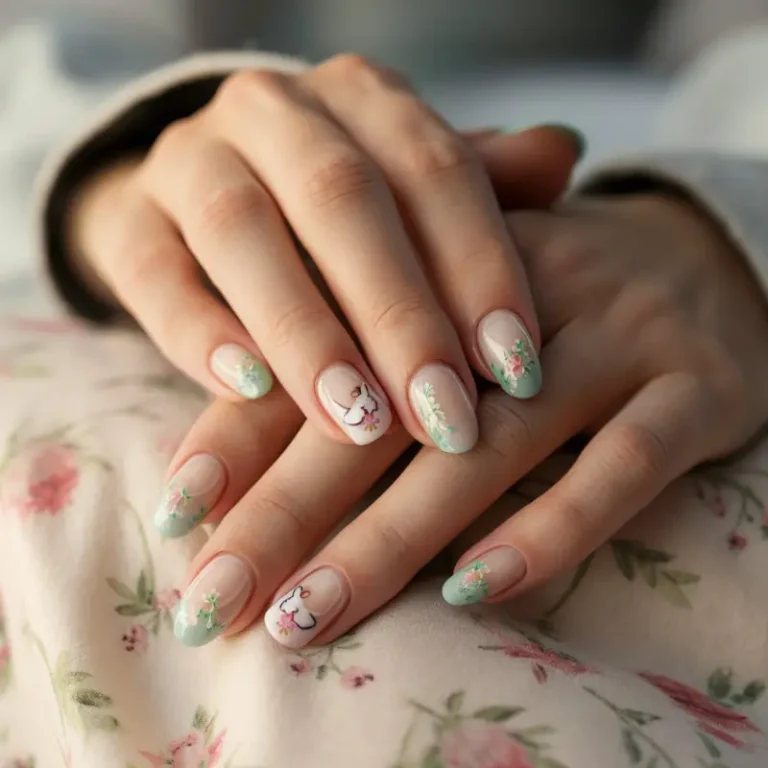
Mix & Match Easter Egg Nail Art
Why settle for one design when you can mix them all? Think of Easter Egg Nails as a colorful patchwork quilt—playful, diverse, and charming.
🎨 Combine stripes, dots, and florals for a unique set
🎨 Use different pastel bases for each nail
🎨 Add a touch of metallic accents for contrast
3D Easter Egg Nails for a Unique Texture
If you love bold, statement-making nails, try 3D designs:
🌟 Embossed egg patterns – Raised polish for texture
🌟 Tiny pearl accents – Mimicking delicate egg decorations
🌟 Mini rhinestones & gems – Adding sparkle and elegance

Easter Egg Nail Stickers & Decals: Easy Designs
Not great at freehand nail art? No worries—stickers and decals are like temporary tattoos for your nails.
Just peel, stick, and seal with a top coat for effortless Easter glam.
How to Make Easter Egg Nails Last Longer
To prevent chipping and keep your nails looking fresh:
✅ Apply a base coat to protect your nails
✅ Use thin layers of polish for better adhesion
✅ Seal with a quality top coat
✅ Avoid prolonged water exposure

Easter Egg Nails with Rhinestones & Gems
Want glamorous Easter nails? Add rhinestones, pearls, or gem accents for an eye-catching, luxe effect.
FAQs About Easter Egg Nails
1. How long do Easter Egg Nails last?
Easter Egg Nails can last 7-14 days, depending on the type of polish used. Gel nails can last up to 3 weeks, while regular polish may start chipping after a week. Using a good base coat and top coat can help extend their wear.
2. What is the easiest Easter Egg Nail design for beginners?
The easiest designs include polka dots, stripes, and pastel ombre. Using nail stickers or decals is a great way to achieve a detailed look without needing advanced nail art skills.
3. Can I do Easter Egg Nails without professional tools?
Yes! You can use household items like a bobby pin for dots, tape for stripes, and a makeup sponge for ombre effects. Stickers and press-on nails are also easy alternatives.
4. What nail polish colors work best for Easter Egg Nails?
Soft pastels like pink, blue, mint green, yellow, and lavender are traditional. For a modern twist, try metallics, speckled finishes, or holographic polishes.
5. How can I remove Easter Egg Nail designs without damaging my nails?
For regular polish, use a non-acetone remover to prevent dryness. If using gel polish, soak your nails in acetone for 10-15 minutes, then gently remove with an orangewood stick. Always follow up with cuticle oil and moisturizer.
DIY Nail Mask Recipes for Stronger, Healthier Nails
After rocking your Easter Egg Nails, your nails might need some extra care. Just like a deep-conditioning treatment for your hair, a nourishing nail mask can help repair, strengthen, and hydrate weak nails. Here are three easy, natural DIY nail mask recipes to restore nail health.
1. Coconut & Honey Nail Strengthening Mask 🌿🍯
Best for: Weak, brittle nails that break easily
💛 Why it works:
- Coconut oil deeply hydrates and strengthens the nail bed.
- Honey is antibacterial and promotes nail growth.
- Lemon juice helps remove yellow stains from past nail polish.
🔹 Ingredients:
- 1 tbsp coconut oil
- 1 tsp honey
- 5 drops fresh lemon juice
🔹 How to use:
- Mix all ingredients in a small bowl.
- Massage the mixture onto your nails and cuticles.
- Leave it on for 15-20 minutes before rinsing with warm water.
- Repeat 2-3 times per week for stronger, shinier nails.
2. Olive Oil & Garlic Nail Growth Mask 🧄✨
Best for: Slow-growing nails that need a boost
💚 Why it works:
- Olive oil deeply nourishes and softens nails.
- Garlic contains sulfur, which strengthens nails and prevents breakage.
🔹 Ingredients:
- 1 tbsp extra virgin olive oil
- 1 clove garlic, finely minced
🔹 How to use:
- Heat the olive oil slightly (warm, not hot).
- Add minced garlic and let it infuse for 10 minutes.
- Strain out the garlic and massage the oil onto nails.
- Leave it on for 15 minutes, then rinse.
- Use 2-3 times a week to encourage nail growth.
👉 Pro tip: If the garlic smell lingers, wash your hands with lemon juice to neutralize it!
3. Avocado & Vitamin E Repair Mask 🥑💖
Best for: Dry, peeling nails in need of deep repair
💚 Why it works:
- Avocado is rich in vitamins and fatty acids that repair damaged nails.
- Vitamin E oil hydrates and restores elasticity to prevent peeling.
🔹 Ingredients:
- ½ ripe avocado, mashed
- 1 tsp Vitamin E oil (or break open 2 capsules)
🔹 How to use:
- Mix the avocado and Vitamin E oil into a smooth paste.
- Apply a thick layer to your nails and cuticles.
- Let it sit for 20 minutes, then rinse with warm water.
- Repeat twice a week for deep nail hydration.
Bonus Nail Care Tip: 🌟
💡 After using any of these masks, apply a natural nail strengthener (like castor oil or jojoba oil) overnight for extra nourishment!

Conclusion: Celebrate Spring with Easter Egg Nails!
Easter Egg Nails aren’t just a seasonal beauty trend—they’re a way to express creativity, embrace color, and celebrate the joy of spring.
Whether you opt for pastel polka dots, shimmering ombre, or bold 3D accents, your nails will be as festive and fun as a basket full of Easter eggs. So grab your polish, get creative, and let your nails hop into spring in style! 🐣💅✨
Don’t forget to check out our Pinterest for more beauty tips and inspiration!