Simple Easter Nails: Easy and Elegant Designs for Spring
Easter brings with it a celebration of renewal, bright colors, and the perfect opportunity to refresh your manicure with seasonal nail art, including various easter nail art ideas . Simple Easter nails offer a way to embrace the holiday spirit without requiring professional-level skills or hours of application time. From subtle pastel colors to adorable bunny motifs, these approachable designs can complement your Easter ensemble while keeping your nail game strong for all your spring gatherings.

Why Simple Easter Nails Are Trending
The appeal of simple Easter nail designs lies in their accessibility and versatility. Unlike complex nail art that requires specialized tools or professional application, these straightforward nail art ideas can be:
- Easily DIY-ed at home with basic supplies
- Completed in a reasonable amount of time
- Appropriate for various Easter celebrations
- Wearable beyond the holiday itself
- Suitable for nail beds of all shapes and sizes
Whether you’re attending an Easter brunch, participating in an Easter egg hunt, or simply want to embrace the season’s aesthetic, simple Easter nails provide a festive look without overwhelming your overall style.

Also Read: Easter Gothic Nails: Where Dark Elegance Meets Springtime Rebellion
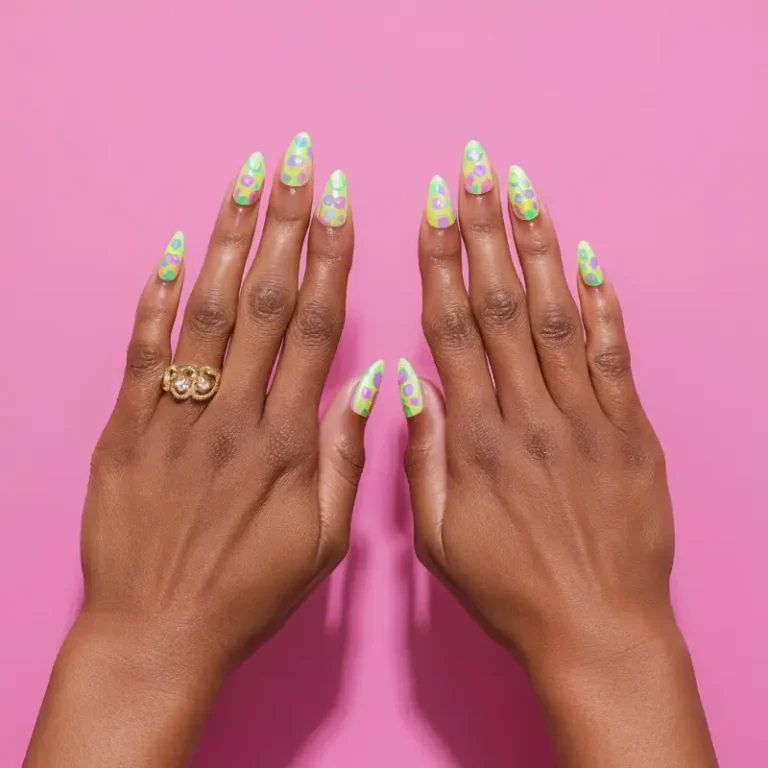
Essential Colors for Easter Nail Art
Pastel Polish Palette
The foundation of most Easter nail designs begins with a selection of pastel colors:
- Baby pink: A soft, feminine shade that works as both a base and accent color
- Lavender: The perfect purple tone that captures spring’s floral essence
- Mint green: A refreshing color that evokes new growth and renewal
- Sunny yellow: Bright enough to make a statement while remaining seasonally appropriate
- Powder blue: A calming shade that pairs beautifully with other pastels
- Soft peach: A warm alternative to pink that flatters many skin tones
These pastel colors can be used individually for minimalist looks or combined to create more dynamic Easter nail art ideas.

Beyond Pastels
While pastels dominate Easter nail designs, don’t be afraid to incorporate nail stickers :
- White: Essential for creating bunny motifs, polka dots, and French tips
- Gold or silver: Metallic accents that add sophistication to simple designs
- Clear polish: For negative space designs and as a glossy top coat
- Glitter: Sparkling elements that add festive dimension to accent nails

Also Read: Easter Egg Nails: A Festive Guide to Playful, Trendy Nail Art
10 Simple Easter Nail Designs Anyone Can Create
1. Pastel French Tips
A seasonal nail art design with a twist on the classic French manicure:
Materials needed:
- Base coat
- Sheer pink or nude polish
- Pastel polishes of your choice
- Thin nail art brush
- Top coat
Steps:
- Apply base coat followed by one or two coats of sheer pink
- Using a thin brush, paint the tips in different pastel colors
- For a more modern look, try slightly curved or angled tips
- Seal with top coat for shine and protection
This Easter nail design works beautifully on shorter nails and provides a subtle nod to the holiday without being too literal.

2. Easter Egg Speckled Nails
Mimic the appearance of speckled Easter eggs with this charming design:
Materials needed:
- Base coat
- Pastel polish in your preferred shade
- Black or brown polish
- Small nail art brush or toothbrush
- Top coat
Steps:
- Apply base coat followed by two coats of your chosen pastel
- Dip a small brush or toothbrush in black or brown polish
- Run your finger along the bristles to create random speckles on each nail
- Allow to dry completely before applying top coat
This design creates an eye-catching effect that will really pop while remaining incredibly simple to execute.

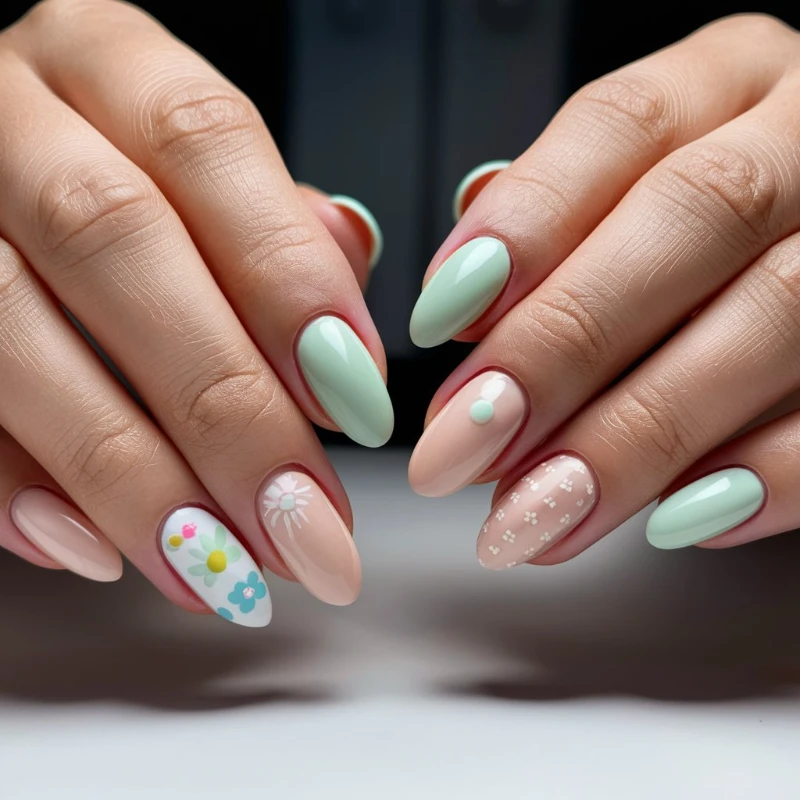
3. Minimalist Bunny Accent Nail
Add a touch of Easter whimsy with a single bunny accent:
Materials needed:
- Base coat
- Pastel polish for base color
- White polish
- Dotting tool or bobby pin
- Pink polish for nose
- Black polish for eyes
- Thin brush
- Top coat
Steps:
- Apply base coat and two coats of pastel polish to all nails
- On one accent nail, use white polish to create a circle for the bunny face
- Add two smaller white circles above for bunny ears
- Use a dotting tool to add pink nose and black eyes
- Seal with top coat
This cute Easter nail design keeps most of your manicure simple while adding just enough holiday charm.

Also Read: Easter Bunny Nails: The Ultimate Guide to a Hoppy, Trendy Manicure
4. Pastel Dots Easter Nails
Create a festive pattern with minimal tools:
Materials needed:
- Base coat
- White or light pastel base polish
- Various pastel polishes
- Dotting tool (or bobby pin/toothpick)
- Top coat
Steps:
- Apply base coat followed by two coats of white or light pastel polish
- Once dry, use a dotting tool to create dots of various sizes in different pastel colors
- Allow dots to dry completely
- Seal with glossy top coat
This versatile Easter nail art can be as random or organized as you prefer, making it perfect for beginners.

5. Simple Easter Ombré
Create a gradient effect with your favorite Easter colors to create an ombre effect :
Materials needed:
- Base coat
- Two complementary pastel polishes
- Makeup sponge
- Top coat
Steps:
- Apply base coat followed by one coat of the lighter pastel shade
- On a makeup sponge, apply stripes of both colors side by side
- Dab the sponge onto nails to transfer the colors, creating an ombré effect
- Repeat until desired intensity is achieved
- Clean up edges with nail polish remover
- Seal with top coat
This technique creates a sophisticated Easter manicure that pairs beautifully with spring outfits.

Also Read: Easter Nails Art: A Blooming Canvas for Your Fingertips
6. Easter Pastel Stripes
Simple lines create an effective Easter design:
Materials needed:
- Base coat
- White or nude base polish
- Pastel polishes
- Striping tape or thin nail art brush
- Top coat
Steps:
- Apply base coat followed by two coats of white or nude polish
- Once completely dry, use striping tape or a thin brush to create horizontal or vertical lines in various pastel colors
- For perfectly straight lines, use striping tape as a guide
- Seal with top coat
This Easter nail art idea offers a modern, geometric take on holiday-themed manicures.

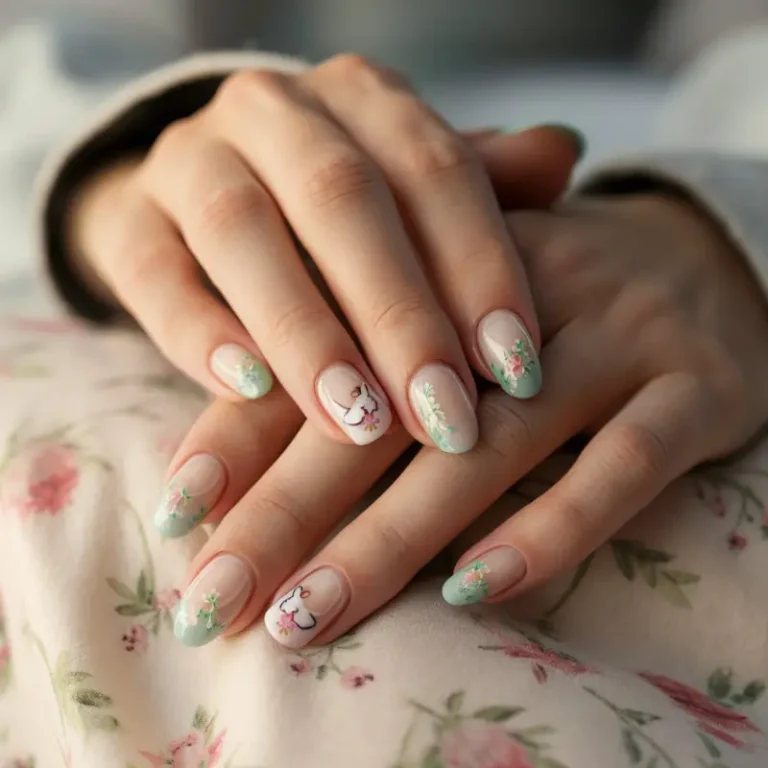
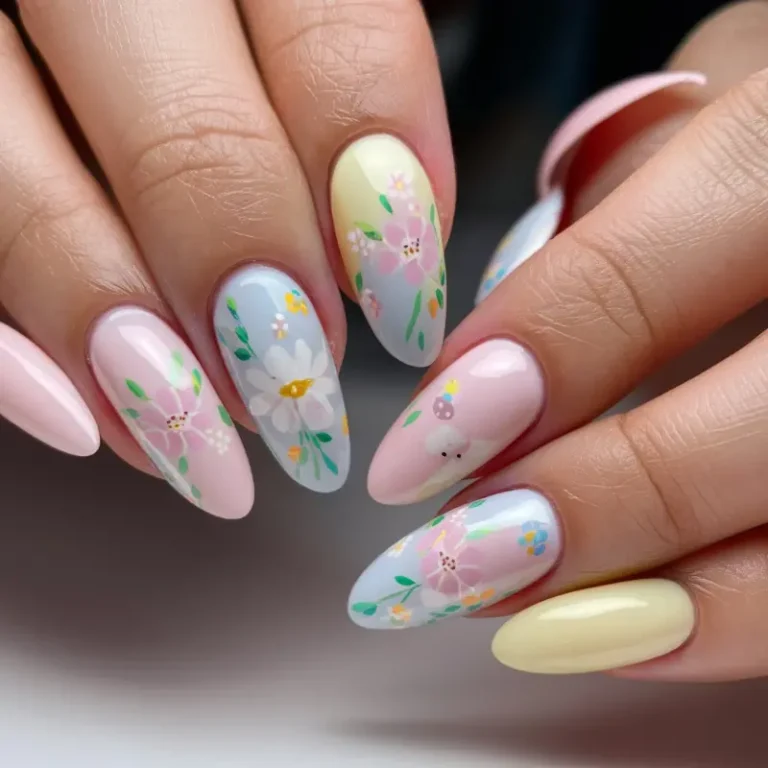
7. Floral Accent Easter Nails
Incorporate spring flowers into your Easter manicure, featuring pretty pastels :
Materials needed:
- Base coat
- Pastel polish for base
- White and yellow polishes for flowers
- Green polish for leaves
- Dotting tool
- Thin nail art brush
- Top coat
Steps:
- Apply base coat and two coats of pastel polish to all nails
- On one or two accent nails, use a dotting tool to create small white dots in a circle pattern for flower petals
- Add yellow dots in the center of each flower
- Use a thin brush to add small green leaves
- Seal with top coat
This design celebrates spring’s floral awakening while keeping most nails simple and elegant.

8. Easter Polka Dot French Tips
Combine two classic elements for a festive look:
Materials needed:
- Base coat
- Sheer pink or nude polish
- White polish for tips
- Pastel polishes for dots
- Dotting tool
- Top coat
Steps:
- Apply base coat followed by sheer pink polish
- Create white French tips using a thin brush
- Once tips are dry, use a dotting tool to add pastel polka dots along the tip line
- Seal with top coat
This Easter nail design elevates the traditional French manicure with playful seasonal elements.

Also Read: Light Pink Chrome Nails: The Ultimate Trend Guide for 2025
9. Negative Space Easter Egg Nails
Create modern Easter egg outlines:
Materials needed:
- Base coat
- Clear or sheer pink polish
- Pastel polishes
- Thin nail art brush
- Top coat
Steps:
- Apply base coat followed by clear or sheer pink polish
- Use a thin brush to outline egg shapes in various pastel colors
- Leave the inside of the eggs empty for a negative space effect
- Add small details like dots or lines inside some eggs if desired
- Seal with top coat
This contemporary approach to Easter nail art creates a sophisticated yet festive look.

10. Pastel Color Block Easter Nails
Create a patchwork of Easter colors:
Materials needed:
- Base coat
- Various pastel polishes
- Striping tape (optional)
- Top coat
Steps:
- Apply base coat to all nails
- Divide each nail into 2-3 sections using striping tape (optional)
- Fill each section with a different pastel color
- Remove tape while polish is still slightly wet
- Seal with top coat
This geometric approach to Easter nails creates a modern, artistic manicure that’s still simple to execute.

Also Read: Neon Bright Summer Nails: The Ultimate Guide for 2025
Tips for Perfect Simple Easter Nails
Preparation Is Key
Before beginning any Easter nail art:
- Remove old polish completely
- Gently push back cuticles
- File nails to desired shape
- Buff nail surface lightly
- Clean nails with polish remover to ensure oil-free surface
- Always apply a base coat to protect nails and help polish adhere
Tool Alternatives for Easter Nail Art
Don’t have specialized nail art tools? Try these household alternatives:
- Bobby pin: Works as a dotting tool for creating small dots
- Toothpick: Perfect for detailed work and dragging polish to create designs
- Cut-up makeup sponge: Ideal for creating ombré effects
- Scotch tape: Can be used instead of striping tape for clean lines
- Plastic straw: Cut a tiny section and use the end for creating circles
Extending the Life of Your Easter Manicure
Make your Easter nails last through all your holiday celebrations:
- Apply thin layers of polish rather than thick coats
- Allow each layer to dry completely before adding the next
- Cap the free edge of your nails with polish to prevent chipping
- Apply a fresh layer of top coat every 2-3 days
- Wear gloves when cleaning or doing dishes
- Apply cuticle oil daily to prevent polish from becoming brittle

Easter Nail Ideas for Different Skill Levels
Beginner-Friendly Easter Nails
If you’re new to nail art:
- Start with a single color pastel manicure
- Try an accent nail with simple dots or lines
- Use nail stickers for detailed designs
- Opt for pastel French tips
- Try speckled Easter egg nails (very forgiving for beginners)
Intermediate Easter Nail Art
Ready for a bit more challenge:
- Create simple floral designs
- Try color blocking with clean lines
- Attempt basic bunny face accent nails
- Experiment with ombré techniques
- Add glitter accents to pastel bases
Advanced Easter Nail Designs
For those with steady hands:
- Hand-paint detailed Easter motifs
- Create intricate patterns with multiple colors
- Try advanced French tip variations
- Combine multiple techniques in one manicure
- Experiment with 3D elements like small gems or charms

Also Read: 20 Bright Summer Nails: Colorful Inspirations for Your Summer Look
Easter Nail Art for Different Nail Lengths
Short Nail Easter Designs
Working with limited space:
- Single accent details rather than full-nail designs
- Horizontal stripes to create the illusion of width
- Small polka dots or speckles
- Pastel French tips
- Simple color blocking

Medium-Length Easter Nails
The most versatile canvas:
- Easter egg designs on full nails
- Bunny accent nails
- Floral patterns
- Combination of techniques
- Negative space designs

Long Nail Easter Designs
Taking advantage of extended space:
- Gradient designs that flow from cuticle to tip
- Multiple Easter motifs on a single nail
- More elaborate patterns and details
- Combination of textures and finishes
- Extended French tips with Easter accents

Pairing Your Easter Nails with Outfits
Complementing Your Floral Easter Dress
Match your manicure to your Easter ensemble:
- Pull a subtle color from your dress pattern for your base polish
- Consider the overall color scheme of your outfit
- For busy patterns, opt for simpler nail designs
- For solid-colored dresses, your nails can be more elaborate

Easter Nails for Casual Celebrations
For less formal Easter gatherings:
- Playful designs like bunny ears or Easter eggs
- Brighter pastel combinations
- Fun accent nails with holiday motifs
- Glitter accents for a festive touch
Professional Settings with Easter Spirit
For work-appropriate Easter nails:
- Subtle pastel French tips
- Sophisticated speckled designs
- Minimal accent details
- Elegant color combinations
- Understated shimmer rather than bold glitter

Also Read: Summer Nails 2025: A Canvas of Creativity and Color!
Beyond Easter: Extending Your Manicure
The beauty of simple Easter nails is their versatility beyond the holiday, making them some of the best easter nail ideas.
- Speckled designs work well throughout spring
- Pastel colors remain on-trend for the entire season
- Floral elements are appropriate until summer
- French tips in pastel colors transition beautifully to everyday wear
With minor modifications or touch-ups, your Easter manicure can continue looking fresh and seasonal long after the Easter bunny has hopped away.

Conclusion: Embracing Simple Easter Nail Art
Easter nail designs offer a wonderful opportunity to express creativity through various ideas. while celebrating the season. The beauty of simple Easter nails lies in their accessibility—you don’t need professional skills or expensive tools to create a manicure that captures the spirit of spring and the holiday.
Whether you opt for subtle pastel French tips, playful polka dots, or a minimalist bunny accent nail, your Easter manicure can enhance your holiday experience and complement your seasonal wardrobe. The key is choosing designs that match both your skill level and personal style, ensuring your Easter nails bring joy rather than frustration.
Remember that nail art should be fun—embrace imperfections and enjoy the process of creating something special for the holiday. With these simple Easter nail ideas as inspiration, you can create a festive, eye-catching manicure that’s perfect for all your spring celebrations, from Easter brunch to casual gatherings with friends and family.
So gather your pastel polishes, prepare your tools (or their household alternatives), and get ready to welcome spring with a charming Easter manicure that’s as simple or detailed as you desire. Your fingers will thank you for the festive refresh, and you’ll have the satisfaction of sporting seasonally appropriate nail art that enhances every Easter moment. Feel free to leave a comment below with your thoughts. And don’t forget to check out our Pinterest for more beauty tips and inspiration!